Most people think of IoT (Internet of Things) as a collection of tiny brains, without user interfaces, collecting data. Some think it’s a remote controlled animal shelter cat toy or a Grant Imahara style robot to do battle. The truth is that IoT is a very broad term, it covers many types of devices, including remote cat toys!
Here’s a Vine of what Windows IoT means to me… Telerik UI on IoT! This post is a overview tutorial, find the full source code on GitHub. (#bananaForScale)
https://vine.co/v/eXjzEeD53iu
Windows 10 on IoT
The introduction of Windows 10 IoT brings IoT to a whole new level. You get access to your familiar hardware benefits (GPIO, I²C, etc.), but you can now do it with XAML and C#! You can run Windows IoT headless or with a UI (ultimately, this depends on the device you chose to install it on).
I choose the Raspberry PI2 because it has an HDMI video out for display. In my photo and Vine, you’ll see a strange 7″ display, it’s just an HDMI monitor, hardware hacker-style.
Telerik Super Polish
Now that I have access to a UI, one of the very first things I did was attempt to run Telerik UI for Windows Universal on it 🙂 To my delight, it just works. I can actually write an app once and it just works on PC, Tablet, Xbox One, Hololens and IoT. The promise Microsoft gave us WPDEVs two years ago is finally taking shape.
Enough talk, let’s get coding
I’ve posted my source for this project and it’s prerequisites on Github. Please see the README.md so you know what you’ll need to get started.
Step One – File > New
Open Visual Studio 2015 and go to File > New > Project. Drill down to Universal, select Blank App, give it a name and click OK.

Step Two – Add Project References
Normally you may be used to adding actually DLLs to a project. This approach is slightly different. we’re using Extension SDKs. Right click on your project’s references, select Add Reference, drill down to Extensions under Universal Windows (#1) and check off the two items you see in #2.
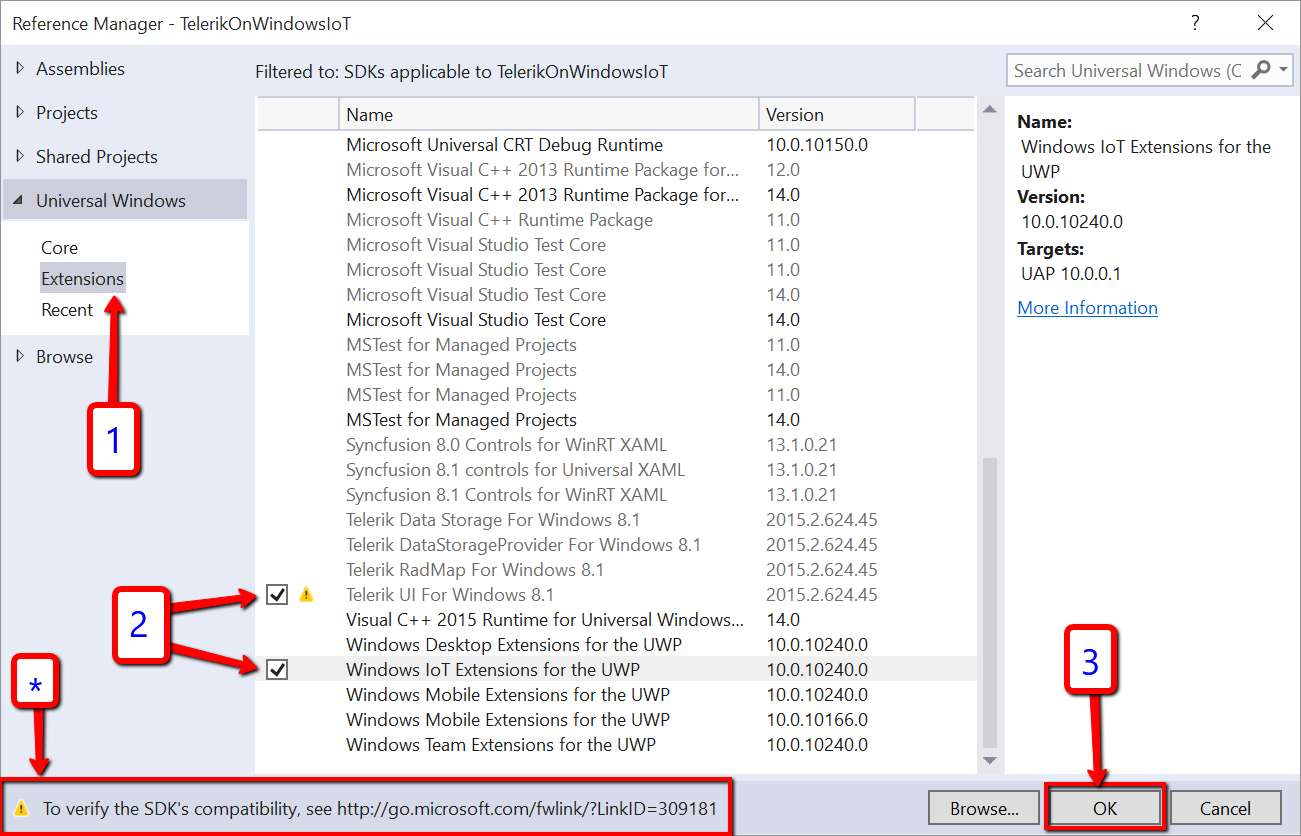
[UPDATE – Telerik for UWP is available as of Q1 2016, get it here. and reference Telerik UI for Universal Windows Platform in the image above]
The first reference, Telerik UI for Windows 8.1, is the Extension SDK name for the Telerik UI for Windows Universal controls. Don’t worry about the asterisk (*), it just means that it wasn’t compiled specifically for UWP yet, but it still works as expected.
The second item, Windows IoT Extensions for the UWP, is what allows your app to deploy to Windows IoT and provides the base classes for things like GPIO.
Your references should now look like this:

Step Three – Dev Time
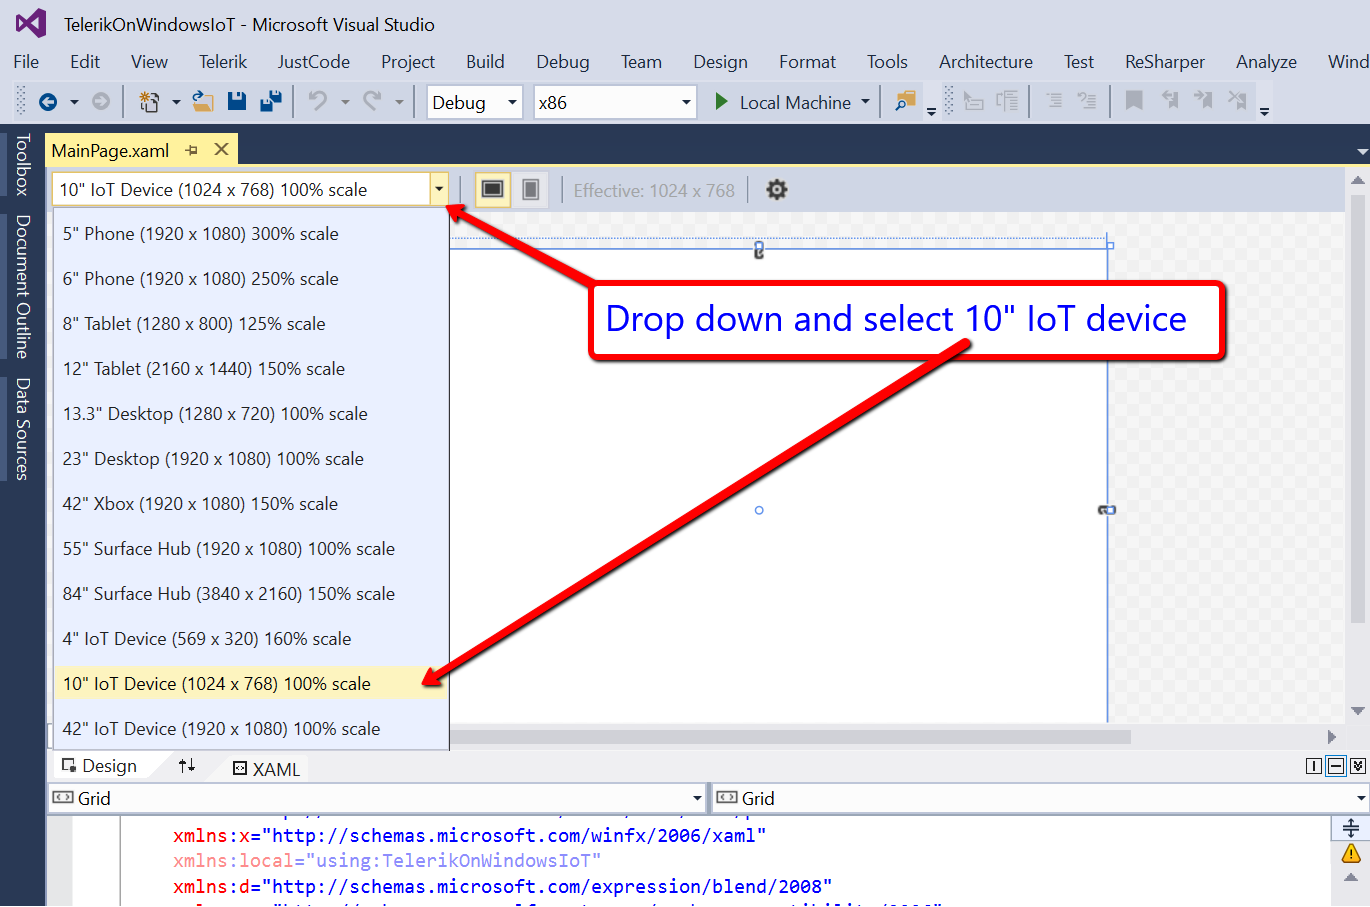
First, let’s switch your designer to show a 10″ IoT device. Its usually a 5″ mobile phone at startup because that’s the first item in the list. Note: Take a step back for a second and see all those device types, your Telerik app will run on all of them!
Now let’s add a Telerik Chart to the UI. In my demo app on GitHub, I have some sample Car data that has the following properties: Make, Model Year and Price (model code is here). That sample data is loaded into a collection in the MainViewModel.
Now that I have a collection of cars, I want to show a chart. Let’s use a BarChart that groups by Make and shows the Price (find the UI code here).
- Begin by adding this to the top of the XAML page: xmlns:chart=”using:Telerik.UI.Xaml.Controls.Chart”, this is so you can instantiate any control in the Chart namespace.
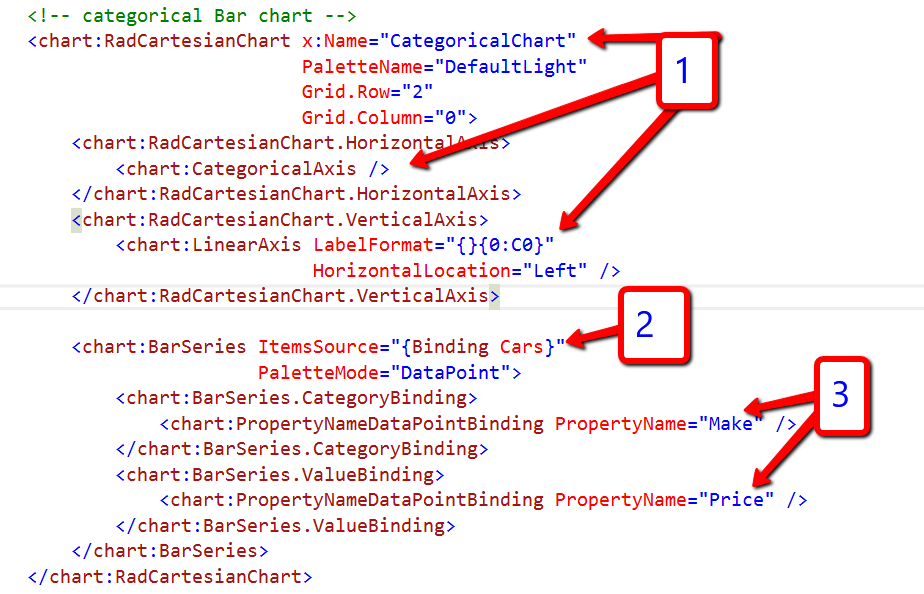
- Next, declare RadCartesianChart and set the axes accordingly, CategoryAxis for the horizontal and LinearAxis for the vertical (#1).
- Now, we add a BarSeries and set the ItemsSource via databinding to the Cars collection (#2).
- Lastly, set the property name Make for the CategoryBinding and Price for the ValueBinding (#3).
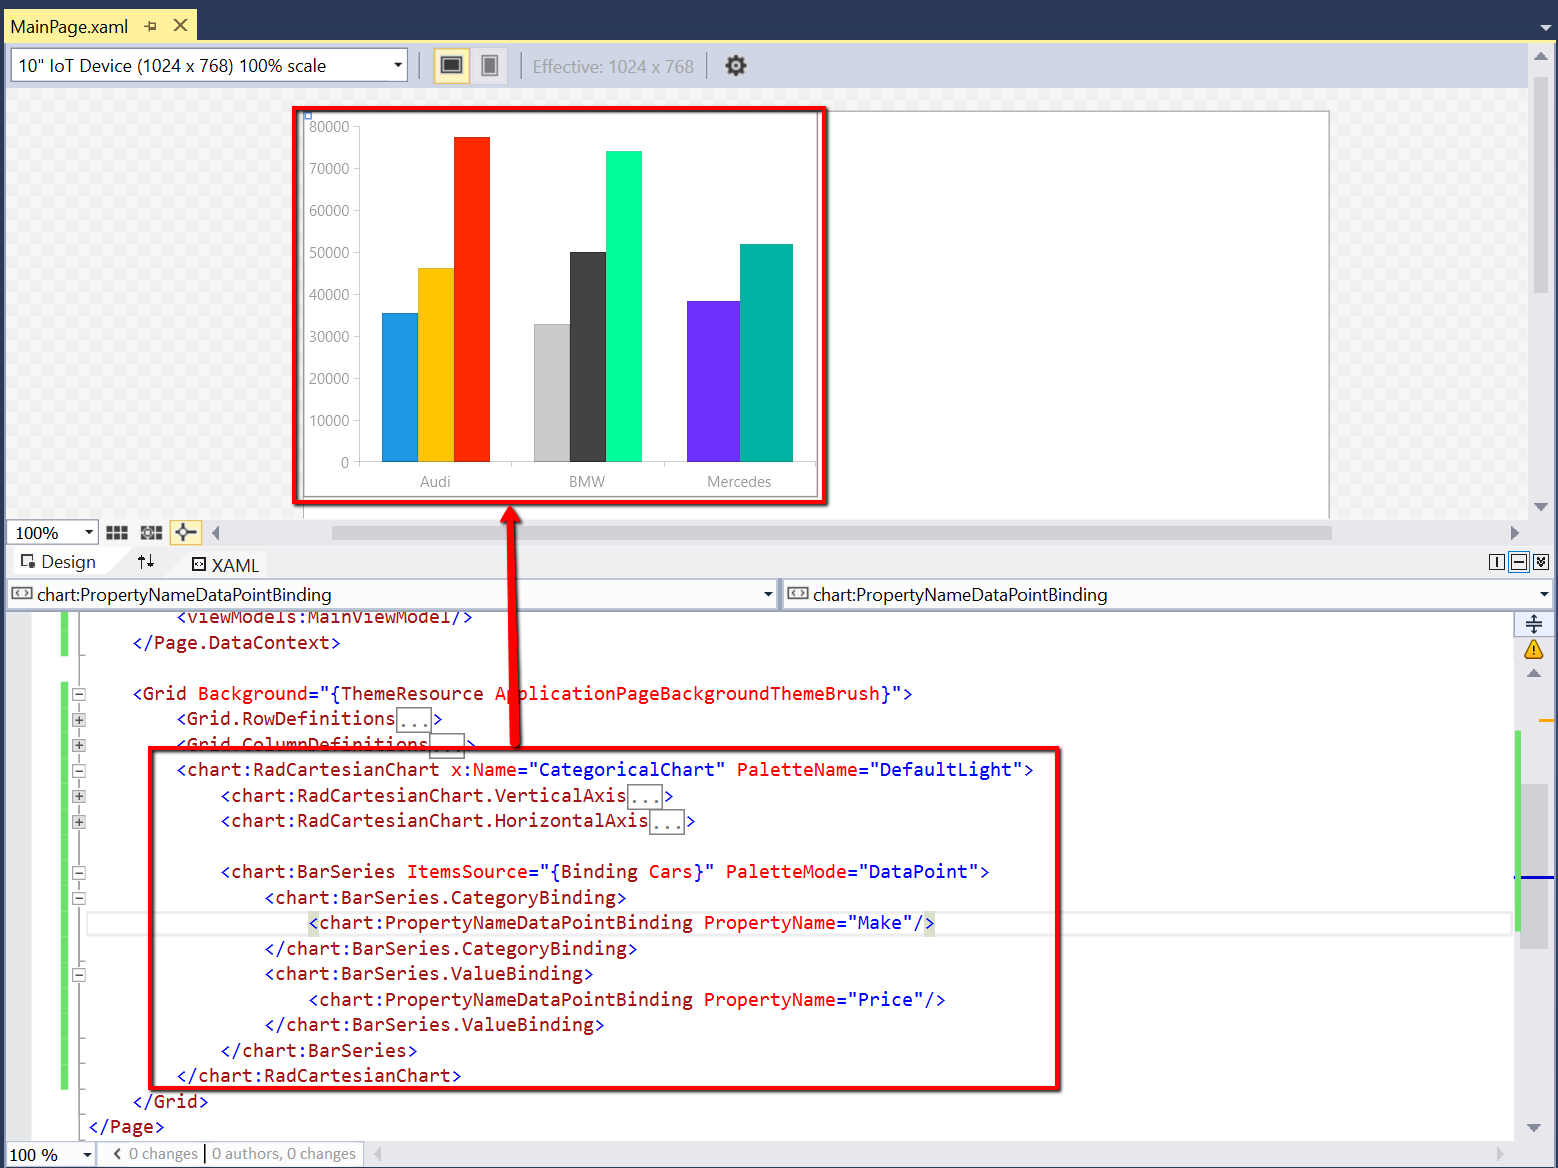
If you do a Build at this point, and you’ve added sample data to the view model like I did, you’ll see data in the UI designer (very cool that methods written to work at run-time, work at design-time). Like this:
Step Four – Deploy to Device
I added a couple more chart examples and a Slider control to change the Price values dynamically, but you don’t need to take it that far to see your progress. Just deploy onto your Windows IoT device at this point to see that it works!
Some tips on Windows 10 IoT
I highly recommend that you put aside a about two hours to prepare your board for the first time. You will use a tool that comes with the Windows 10 IoT build for your device to deploy, it creates the partition and loads the ffu. Its pretty straightforward and much easier than it was before RTM.
Deploying and debugging is pretty easy, the IoT device is treated as any other remote machine. Steps to take are:
- Right click on the project and select Properties
- In the left column, select Debug
- In the Target DropDownList, select Remote Machine
- Then click the “Find” button and enter the IP address of the Raspberry Pi 2 (you’ll find this displayed on the Pi’s home screen)
- Set the Authentication Mode to None
- Save and close the Properties page.
Now when you start debugging, it will look for your Pi 2 on the network, deploy and run the app package. For more Remote Debugging details see this documentation (note that the Remote Debugger tools are already built into Windows 10 Core IoT).
Well, that’s it for now. I will be doing another IoT and Telerik post soon. I’ll do another post on how to use GPIO ports, reading sensor data and showing it in a gorgeous UI
Happy coding,
Lance
Windows 10 IoT